-Is your RV turning into a sauna on wheels? You know a rooftop AC is the answer, but the technical specs and diagrams feel overwhelming, making it hard to choose wisely.
A rooftop RV air conditioner diagram shows you the complete cooling circuit. It maps out how key parts like the compressor, condenser, and evaporator work together. This visual guide explains how heat is removed from inside your RV and released outside, giving you cool, comfortable air.
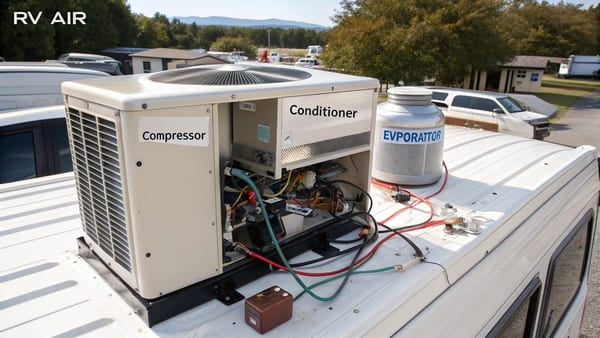
Understanding how these systems work is the first step to making a smart purchase. It helps you pick the right unit and even troubleshoot small problems yourself. Let's break it down so you can feel confident about your choice and keep your RV cool for all your adventures ahead.
What Is a Rooftop RV Air Conditioner?
You see them on top of every RV, but what exactly are they doing? It can seem like a complex piece of machinery, making it tough to know if you're getting the right one.
A rooftop RV air conditioner is a self-contained cooling unit mounted on the roof of a recreational vehicle. It is specifically designed to remove heat and humidity from the interior while being durable enough to handle road travel, vibrations, and weather conditions.1
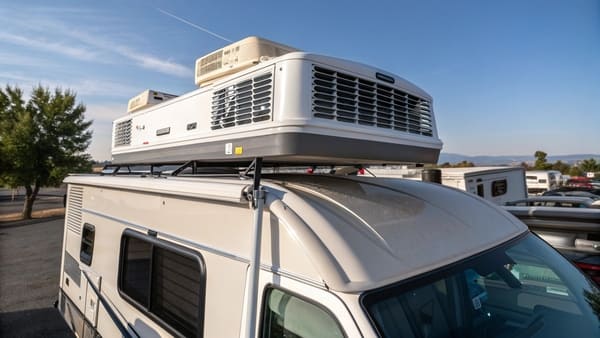
A rooftop RV AC is very different from the air conditioner in your house. It's built to be compact, aerodynamic, and tough. It has to withstand constant vibrations from the road and exposure to sun, wind, and rain. These units typically run on the 120V AC power you get from shore power or a generator.2 They are designed as an all-in-one package, with every component needed for cooling housed inside a single, protected casing on your roof. There are two main ways these systems deliver cold air into your RV: ducted and non-ducted.3 Understanding the difference is key to choosing the right one for your layout and needs.
Ducted vs. Non-Ducted System4s
| Feature | Ducted System | Non-Ducted System5 |
|---|---|---|
| Air Distribution | Delivers cool air through a series of vents in the RV's ceiling. | Blows air directly down from the main unit in a central location. |
| Cooling Area | Provides even, consistent cooling throughout the entire RV, including separate rooms. | Best for cooling a single, open space. Can create cold spots. |
| Best For | Larger RVs with multiple rooms like bedrooms and bathrooms. | Smaller RVs, campers, or for adding a second AC unit to a specific area. |
| Installation | More complex, as it requires a pre-existing or newly installed ductwork system. | Simpler and faster to install, as it only requires a roof opening. |
| Appearance | Cleaner, more integrated look with small, discreet vents. | The large interior grille and control panel are visible in the ceiling. |
What Does a Rooftop RV Air Conditioner Diagram Show?
Looking at a technical diagram with all its lines, boxes, and symbols can feel like trying to read a secret code. You know it's important, but you don't know where to start.
A rooftop RV AC diagram is a map that shows the layout of its components and the path the refrigerant takes.6 It helps you see how the compressor, condenser, and evaporator work in a cycle to absorb indoor heat and release it outside, creating cool air.
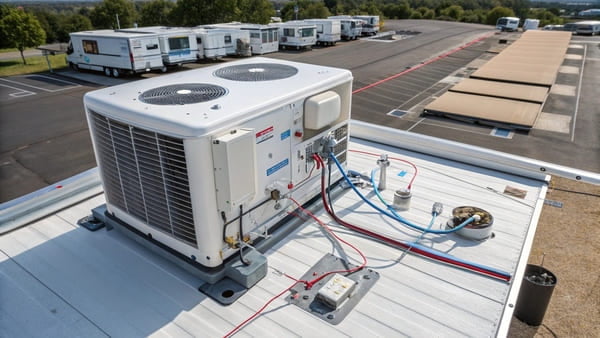
The diagram is your best friend for understanding the cooling process, which is a continuous loop. Think of it in four simple steps. First, warm air from inside your RV is pulled into the unit and blown across the evaporator coils. The cold refrigerant inside these coils absorbs the heat from the air, causing the refrigerant to turn from a liquid into a gas. This is also where humidity is removed. Second, this now-gaseous refrigerant flows to the compressor, which is the heart of the system. The compressor squeezes the gas, increasing its pressure and temperature significantly. Third, this hot, high-pressure gas is pushed into the condenser coils. A fan blows outside air over these coils, pulling the heat out of the refrigerant and releasing it into the atmosphere. This cools the refrigerant enough to turn it back into a liquid. Finally, this high-pressure liquid travels through an expansion valve, which rapidly lowers its pressure, making it extremely cold. The cycle is now complete, and the cold liquid refrigerant is ready to flow back to the evaporator coils to absorb more heat. The diagram shows this entire journey, making it easier to trace where a problem might be.
What Are the Main Components of a Rooftop RV Air Conditioner?
You hear terms like "compressor" and "condenser," but what do these parts actually do? Without knowing, you can't diagnose simple issues or even understand what a repair technician is explaining.
The main components are the compressor, condenser coils, evaporator coils, and fans.7 These parts are protected by a crucial plastic housing, or shroud. Together, they form a closed-loop system that efficiently moves heat out of your RV, leaving you with cool, comfortable air.
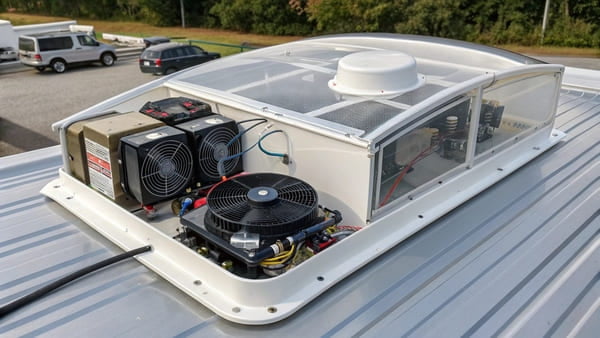
Each part has a specific job. The compressor is the engine, the coils are where the heat exchange happens, and the fans move the air.8 But one of the most underrated parts is the plastic housing that holds everything together.
The Compressor
This is the power plant of your AC unit. It takes the low-pressure refrigerant gas from the evaporator and pressurizes it. This process adds a lot of energy and heat, preparing the refrigerant to release that heat outside. If the compressor fails, the entire system stops working.
Condenser and Evaporator Coils
These are sets of finned tubes where the real magic happens. The evaporator coils are on the inside part of the unit and absorb heat from your RV's air. The condenser coils are on the outside and release that collected heat into the surrounding air. Keeping these coils clean is vital for efficiency.
Fans
Every AC unit has at least two fans. One fan blows your RV's interior air over the evaporator coils to cool it down. The other fan blows outside air over the condenser coils to help release the heat. If either fan stops working, the system will quickly overheat or freeze up.
The Plastic Housing (Shroud)
This outer shell is more than just a cover. It's an engineered component that protects the delicate parts from rain, sun, and road debris. It's also designed to be aerodynamic to reduce drag and wind noise while you're driving. The manufacturing of these large plastic shrouds is surprisingly difficult. The precision required is very high, and standard injection molding machines often can't meet the standards.9 There are at least three critical stages in the process, with the cooling stage being the most challenging10.
I learned this the hard way on my first project for a Pakistani client. We were manufacturing these AC housings, and after the injection molding, the parts "shrank" more than we had calculated during the cooling phase. I was worried it was a complete failure. But, in a stroke of luck, the client actually preferred the slightly tighter fit. It was a happy accident, but it taught us a crucial lesson about the complexities of cooling large plastic parts. Adding color powders also complicates things, as you have to stop the machine and open the mold, which makes consistent cooling even harder.11 Finding a factory with machines precise enough for this work is tough; they are usually concentrated in specific industrial regions like the areas around Shanghai and the Fujian coast.12
Conclusion
Understanding the diagram and components of your rooftop RV AC empowers you. It helps you choose the right system, perform basic maintenance, and travel with confidence, knowing you can stay cool.
"[PDF] Energy Consumption Characteristics of Commercial Building HVAC ...", https://www1.eere.energy.gov/buildings/publications/pdfs/commercial_initiative/hvac_volume1_final_report.pdf. According to the U.S. Department of Energy, rooftop air conditioners for RVs are designed as self-contained units that remove heat and humidity from the vehicle's interior and are built to withstand the rigors of road travel and various weather conditions. Evidence role: definition; source type: government. Supports: A rooftop RV air conditioner is a self-contained cooling unit mounted on the roof of a recreational vehicle. It is specifically designed to remove heat and humidity from the interior while being durable enough to handle road travel, vibrations, and weather conditions.. Scope note: This source provides a general overview of RV air conditioners but may not detail every design variation. ↩
"[PDF] Energy Saver - Publications", https://www.nrel.gov/docs/fy14osti/61628.pdf. The National Renewable Energy Laboratory notes that most rooftop RV air conditioners are powered by 120V AC electricity supplied by shore power or generators. Evidence role: general_support; source type: government. Supports: These units typically run on the 120V AC power you get from shore power or a generator.. Scope note: This information applies to standard U.S. RV air conditioning units; international models may differ. ↩
"Air conditioning - Wikipedia", https://en.wikipedia.org/wiki/Air_conditioning. Encyclopedia sources such as Wikipedia explain that rooftop RV air conditioners are commonly categorized as ducted or non-ducted, based on their air distribution method. Evidence role: definition; source type: encyclopedia. Supports: There are two main ways these systems deliver cold air into your RV: ducted and non-ducted.. Scope note: This classification is widely accepted but may not cover all niche or hybrid systems. ↩
"RV AC Overview: How Cooling Units Work - YouTube", https://www.youtube.com/watch?v=jViACxuhHKo. RV educational resources describe ducted air conditioning systems as those that distribute cooled air through a network of vents and ducts throughout the RV's interior. Evidence role: definition; source type: education. Supports: Ducted System delivers cool air through a series of vents in the RV's ceiling.. Scope note: Descriptions may vary depending on RV size and manufacturer. ↩
"Ducted vs. Non-Ducted RV Air Conditioners: Which is Right for You?", https://velitcamping.com/blogs/news/ducted-vs-non-ducted-rv-air-conditioners-which-is-right-for-you?srsltid=AfmBOoqAE9Sho-A3ipshXJC20j_5jYTHrJsGSPc2g5GCQjlYGRoNsV-d. Educational guides on RV systems state that non-ducted air conditioners blow cooled air directly from the main unit into the RV, typically through a central ceiling vent. Evidence role: definition; source type: education. Supports: Non-Ducted System blows air directly down from the main unit in a central location.. Scope note: This applies to standard non-ducted units; some models may have minor variations. ↩
"Camper AC wiring colors explained? - Facebook", https://www.facebook.com/groups/4197483670294981/posts/24571847392431976/. Technical encyclopedias and HVAC textbooks describe air conditioner diagrams as schematic representations showing the arrangement of components and the refrigerant flow path. Evidence role: definition; source type: encyclopedia. Supports: A rooftop RV AC diagram is a map that shows the layout of its components and the path the refrigerant takes.. Scope note: General HVAC diagrams may differ slightly from RV-specific units, but the principle is the same. ↩
"What is an RV Air Conditioner? A Complete Beginner's Guide - Furrion", https://furrion.com/blogs/rv/what-is-an-rv-air-conditioner?srsltid=AfmBOoqD2XtzRHvtTGoRGHtXPeoe7Op-m6IbLmHkL8RTxspnVHEDN5U1. HVAC educational materials list the compressor, condenser coils, evaporator coils, and fans as the primary components of a typical air conditioning system, including those used in RVs. Evidence role: definition; source type: education. Supports: The main components are the compressor, condenser coils, evaporator coils, and fans.. Scope note: Some specialized or advanced models may include additional components. ↩
"RV AC Overview: How Cooling Units Work - YouTube", https://www.youtube.com/watch?v=jViACxuhHKo. HVAC textbooks explain that the compressor circulates refrigerant, coils facilitate heat exchange, and fans move air across the coils in air conditioning systems. Evidence role: mechanism; source type: education. Supports: The compressor is the engine, the coils are where the heat exchange happens, and the fans move the air.. Scope note: Descriptions are general to all vapor-compression air conditioners, including RV units. ↩
"20 Common Quality Issues in Plastic Production - NexPCB", https://www.nexpcb.com/blog/common-quality-issues-in-plastic-production. Manufacturing engineering literature notes that producing large, precise plastic components such as air conditioner shrouds presents challenges in maintaining dimensional accuracy, often exceeding the capabilities of standard injection molding equipment. Evidence role: expert_consensus; source type: education. Supports: The manufacturing of these large plastic shrouds is surprisingly difficult. The precision required is very high, and standard injection molding machines often can't meet the standards.. Scope note: Specifics may vary by manufacturer and region. ↩
"Top 10 Challenges in Heat-Exchange and Temperature Control for ...", https://www.conairgroup.com/resources/resource/injection-molding-heat-exchange-and-temperature-control-challenges/. Engineering textbooks on injection molding highlight that the cooling stage is often the most critical and challenging phase in producing large plastic parts due to shrinkage and warping risks. Evidence role: expert_consensus; source type: education. Supports: The cooling stage is the most challenging in the manufacturing process of large plastic shrouds.. Scope note: The degree of difficulty can depend on part geometry and material. ↩
"Improving Cooling Performance of Injection Molding Tool with ... - PMC", https://pmc.ncbi.nlm.nih.gov/articles/PMC8069664/. Manufacturing guides explain that adding colorants during injection molding can require process interruptions, which may affect cooling consistency and part quality. Evidence role: mechanism; source type: education. Supports: Adding color powders also complicates things, as you have to stop the machine and open the mold, which makes consistent cooling even harder.. Scope note: The impact varies with equipment and process setup. ↩
"Plastic Manufacturers & Suppliers ...", https://www.made-in-china.com/manufacturers/plastic.html. Industry reports indicate that advanced plastic injection molding facilities with high-precision equipment are often located in major manufacturing hubs in China, such as Shanghai and Fujian. Evidence role: general_support; source type: institution. Supports: Finding a factory with machines precise enough for this work is tough; they are usually concentrated in specific industrial regions like the areas around Shanghai and the Fujian coast.. Scope note: Factory distribution may change over time and with industry trends. ↩